Showing posts with label #31DC2013. Show all posts

#31DC2013 Day 7: B&W Nails


It's been really awesome to see people participating in the #31DC2013 on Instagram - people are just so creative! For today's challenge - B&W - I didn't know what I wanted but I knew I wanted to break out my Konad... which has literally been collecting dust since I bought them back in 2010. Shame, I know.

I started with a base of Cult Nails Get It On, one coat of Cult Nails Fetish (a wax finish black) and then for my stamping polish, I used Cult Nails Temptest. For stamping plate, I used the full designs on Konad plate m65. I didn't stamp my pinkie finger and used the ORLY Instant Artist in Crisp White to make my little triangle.


I stamped my ring finger first and it went okay but I didn't let it dry enough and so it smudged when I added Cult Nails Wicked Fast top coat.  Next I stamped my middle finger but didn't line my stamper up right so only 3/4ths of the nail was stamped. On my pointer I pretty much got it down!

Either way, I'm happy with my attempts and look forward to the rest of the challenges as they come!

Disclosure: The product[s] in this post was [were] provided to me by the company for consideration.  For more information, please read this post.

#31DC2013 Day 6: Violet Nails


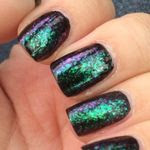
I was probably most happy to get to Day 6 - Violet Nails. I absolutely love wearing purple polish.  I had a base coat of Cult Nails Get It On before decided to wear the new Zoya PixieDust in Carter and then decided to take some striping tape to my ring finger and add a coat of Zoya PixieDust in Stevie. I was really happy with the results. I didn't use top coat for this manicure except on my accent nail but it was a thin layer to keep the PixieDust effect.


I'm in love.

I'm also in love with my CND Special Edition SolarOil. It was released last year and it has hints of vanilla and golden amber. I found out that they are releasing it this year as well and have already purchased a bottle.

Disclosure: The product[s] in this post was [were] provided to me by the company for consideration.  For more information, please read this post.

#31DC2013 Day 5: Blue Nails


I told you I'd catch up! Challenge #5 is Blue Nails - and I was worried about staining so I decided to go with a lighter blue.

I used a base coat of Seche Natural for a matte finish, 2 coats of China Glaze Sci-Fly By which is from the Hologlam collection and then attempted The Nailasaurus waterfall manicure using ORLY Instant Artist in Crisp White, Jet Black and True Blue.


I don't think I totally nailed it, but I'm excited about how simple this was! The stripers on the ORLY Instant Artist are the perfect size for small lines like this - although I think I need to make my lines closer in size and maybe just make more lines in general.  I had tried a few weeks ago and it wasn't really a win.

But hey, it's a learning experience and I'm learning!

Disclosure: The product[s] in this post was [were] provided to me by the company for consideration.  For more information, please read this post.

#31DC2013 Day 4: Green Nails


Day 4 means green nails - one of my least favorite of the polish colors. I started with a base of Cult Nails Get It On followed by 2 coats of Zoya Meg, a shimmery apple green polish. Next I added dots using Ruby Wing Birdie and outlined them with ORLY Instant Artist striper in Jet Black. I did not add a top coat but voila - we have instant cheetah print... in wild colors.


Simple - not overly complicated! The toughest part was outlining the dots as my hand isn't as steady as I'd like but I think it went over okay!


Disclosure: The product[s] in this post was [were] provided to me by the company for consideration.  For more information, please read this post.

#31DC2013 Day 3: Yellow Nails


Cutting it close today, I know. But I had a glorious 3 hour nap as it rained, so sorry, not sorry.

Today's challenge was yellow nails, and this was a challenge for me because I typically HATE yellow polish.  Like really hate.  First I thought about glitter, then cremes, then golds and then I just got distracted.

When I was searching my boxes, I immediately came across Color Club Daisy Does It, which is a yellow microglitter shimmer in a slightly yellow base. However, it was just too sheer so then I found my Ruby Wing Birdie and put down 2 coats of that.  (I started my manicure with Cult Nails Get It On.) Then I added 2 coats of Daisy Does It. But I didn't feel complete so on my ring finger, I added one coat of Sation Twinkle, Twinkle Big Star and one more coat of Daisy Does It to make the glitter look more yellow than gold.  Add Cult Nails Wicked Fast top coat and DONE.


I actually really, REALLY liked this manicure! I didn't get as much glitter as I hoped out of my Sation bottle. The larger rainbow reflective pieces sank towards the sides of my nails and all that really stood out was the red glitter, but I can't wait to layer it over white and see it all pop out. I even considered wearing this look to work! It's just the right touch of glamour.

Disclosure: The product[s] in this post was [were] provided to me by the company for consideration.  For more information, please read this post.

#31DC2013 Day 2: Orange Nails


Happy Labor Day to all my USA friends! I literally spent the day doing labor, but what can you do.  Today's challenge was "orange nails" and I had a hard time finding an orange in my stash that I wanted to wear today!

I ended up going with the Jesse's Girl JulieG Beauty Guru as my base. This was part of the original JulieG launch before they got their own bottles.  I started with Cult Nails Get It on for my base coat, 2 coats of polish and Cult Nails Wicked Fast as my top coat.  Then I tried to get overly ambitious with my ORLY Instant Artist water-based paints in Crisp White. I'm one of the new Nail Art Society Nail Art Gurus and these ORLY Instant Artist water-based paints will be in the new box that is coming out. I promise to write more about that later - but I have to say it was really easy to use.

Day 2.


Trying to use my new point-and-shoot camera. It's a Canon PowerShot A4000. I bought this to replace my beloved PowerShot A2000 which broke on the bottom earlier this year.

I think every thing went well until I got to my pointer finger and then I got crazy and it was bad.  But hey, working on it just means I have somewhere to go up!

Disclosure: The product[s] in this post was [were] provided to me by the company for consideration.  For more information, please read this post.

#31DC2013 Day 1: Red Nails


Let me start by saying I got overambitious.

The first of the #31DC2013 is "Red Nails." I was thinking "Hey, I'll be cool - just paint my nails red." I'm still weaning into nail art, trying to stay cool about it all. But then I just got overly excited and was like "DO ALL THINGS."

I started with a base of Cult Nails Get It On. I always wear base coat, even if I'm wearing nothing else that day.  It helps protect my nails and they always look healthy.  (Note I said look, hah.)

Then I put on one coat of Layla Softouch 7 Queen Bourdeaux. This is a lovely firey red that dries to a matte look but as with all Layla Softouch polishes, a top coat will not make it shiny.

But then I was like - I need nail art. I grabbed my striping tape and made a couple of lines, and then a couple more and was like "HAH I made a hashtag."  I painted over my nail with Zoya Bobbi and then pulled the tape off.

Mistake #1: Not waiting long enough to pull the tape off.

So a little came off with the tape and then I realize my hashtag was off centered of the nail.  I used my top coat from Digital Nails hilariously nailed "Ain't Nobody Got Time For That" and looked back at my hands and said...

LET'S ADD RHINESTONES.

Back when I was really interested in making a custom rhinestone iPod case (ahem), I figured out that I could buy tons of rhinestones super cheap on eBay. So I did. And they have sat on my desk ever since.  I have literally only used them once

So back to the beginning. I got overambitious.  I also am using my really big DSLR to take photos, and since I haven't been blogging lately, it felt really bulky in my hands and then I couldn't get the right lighting.

Have you figured out that I'm stalling before showing you pictures? Then again, most people skip the writing and go straight FOR the pictures so without any more rambling.

Day 1.


Ta da. Or something. Well - challenges are all about improvement, so here's to improvement!

Disclosure: The product[s] in this post was [were] provided to me by the company for consideration.  For more information, please read this post.

#31DC2013 by Chalkboard Nails

Over the years, I have been inspired by, but never participated in, a 31/30 Day Challenge. This is where someone has created an editorial calendar for you to follow and it's been fun to watch different bloggers take their own spin on the challenge, whether it's creatively or through their inspirations or heck, it's just pretty.

In 2011, Chalkboard Nails and other nail enthusiasts participating in a 31 Day Challenge and she had so much fun that she repeated the challenge in 2012. (See her 2011 and 2012 round up posts.) Well, when you're successful at something, you keep it going, am I right?

Starting tomorrow is the #31DC2013 by Chalkboard Nails. You can read all the details on her blog but the gist is follow the image prompt, post on your own social media, blog, whatever, and ENJOY! No real rules, you can post more than one per day, just have fun with it.


She has coined #31DC2013 so that you can search for all contributions - since Instagram, Facebook and Twitter all support hashtag searching, be sure to include it with your manicure.

I love the idea of trying this for my first nail challenge. Chalkboard Nails is super inspiring, both in her blogging and her blogging etiquette. (Yes, I did love her Twitter image so much that I was working on redoing my own Twitter icon but I haven't nearly gotten the time to finish it.)