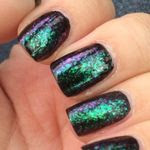
While I was at iFabbo's #iFabboSFcon, I had this lovely woman come up to me and ask me about my nails, then show me hers. She had on a skittle of different decorations and colors that made me say "What are you wearing!" Then she handed me the above envelope with a smile on her face and told me that all the information is inside.
Okay so it wasn't totally as clandestine as that, but it was pretty close to that. She was from Nailed Kit, a company that provides nail art kits that are simple for the beginner (hello, me) but can be used for advanced nail pros too! The company has 4 different categories of kits - Birthday, Bachelorette, Baby Shower and Girls Night which are based on the decals that in the kit. Pick a category, pick a design and then the rest is auto-generated by the Designer. Each Nailed Kit includes the solid base decals, the design you've selected, rhinestones, a nail file and a shaping stick (orange stick).
Inside my Halloween Kit which HOLY COW, GOES AWAY TOMORROW SO GO NOW IF YOU'RE INTERESTED, was the Spooky Spiders design (USD $12.00) which came with a yellow base decals.
Back to the kit. I love the packaging.
I told you yesterday how much I love branding. Super easy here - it's all written out in steps.
Step 1 - Start It!
Their website says that these are real nail polish strips but they are definitely soft and pliable like nail polish stickers. It reminds me of the NCLA decals vs say the China Glaze nail polish appliques. You do have to be careful during the filing or you will tear the strip (did that one on my pinkie, right off the bat).
Step 2 - Personalize It!
This was my first experience with water decals. I immediately didn't pay attention to instruction 1 and cut my decal too far away from the actual printed image. I used tweezers to drop my decal in the water and remove it, and then when I tried to transfer it to my nail, it was all over my cuticles. I decided to take it off, trim it, put it back in the water for a second and then reapply. It worked but don't do it that way. I decided to put another water decal over a bare nail and trimmed it properly first. It worked better. I sealed both with essence gel-look top coat.
Step 3 - Bling It Out!
The kit includes a sheet of multicolored rhinestones that are attached in a chain but you can break it apart easily. I added a single rhinestone over the nail polish decal and then a row of rhinestones to my bare nail and sealed both essence gel-look topcoat.
So Nailed Kit - not only can you buy the kits when you wish but they also offer a Monthly Club for $14 a month (currently in a waitlist). They are also available on social media - Facebook, Twitter, Instagram & Pinterest.
Overall, great for a look, great for a night out, not something that I would buy on a regular basis but that's mostly because I'm still terrible with the solid base decals. Until I master that, I have very little business trying this out. But I definitely think it's a great stocking stuffer kit for the upcoming holidays and I really hope they have some holiday themed kits coming up soon.
Disclosure:
The product[s] in this post was [were] provided to me by the company
for consideration. For more information, please read this post.


