Showing posts with label nail art. Show all posts

Brand Overview: INNI

Now, if you've been following PolishGalore, you know that I love the idea of nail wraps but I'm not the best at applying. That doesn't mean I don't have a whole drawer full of them though! One thing I have been missing is my OWN wraps - literally! Like, what about wearing my PG on my nails, or my cats (I do currently have 7).

Now I can because a new customizable nail wrap company INNI has launched! Use a photo from your computer and upload it to their website and you can have your own wraps for only $9.90 a sheet (30 pieces in 13 different sizes). Not bad for a very special occasion! Did I mention free shipping?


Don't have a photo you want to use but you can draw? They offer that option too. Can't draw? Well there are one million pre-created designs available.

Nail wraps something you use often? They have a subscription service for $19.90 each month to receive your choice of 3 sets (savings of $9.90) that runs through PayPal.

You can create your own by using the "Open Studio"

I decided to create a set using my cat Saffire. I had to make the image a little smaller using the set background scale but that was all. Only downside is there isn't an "undo" button anywhere in case you make a mistake. Instead, you just have to start all over.


Save your design and viola!

Of course I ordered.

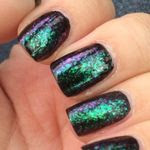
To apply, have a clean nail and choose your width. Smooth on and file down the excess of the wrap. They boast a 10 day wear time and removal is to just peel off the stickers - no remover necessary.

Once mine come in, I'll let you know how they did! According to the website, it takes 1-3 days to create & I should get them in about a week.

Additionally, INNI does have a partner program where you can set up your own shop and receive profits off designs of yours that sell. Please see the link for more information.

Brand Overview: Jamberry Nails


Sisters and best friends Keri, Christy and Lyndsey launched Jamberry Nails in 2010 for women just like themselves who wanted perfectly manicured nails while running from the gym to school drop offs to work and back again. They wanted something doable for people who don't necessarily do "girly" stuff - something easy to follow, last a long time, stylish and can speak to a woman's personal tastes.

July 4th Nail Art with CND VINYLUX!

For once this year, I will be out celebrating the 4th of July and so I knew that I needed some rocking nails. Because I will be out of town, I wanted something with lasting power and what better nail polish to use than long lasting CND VINYLUX Weekly Polish?

I decided to go for a water marble for my test run and the results were definitely neat. I'm my own worst enemy and I have some ideas on how to improve but for now, check out what I did!

To prep, I started with clean nails and got my supplies ready.


I have my favorite polish remover, cotton pads and clean up brush for clean up, regular petroleum jelly with cotton swabs to prep my skin with, orange sticks, glass of tap water and CND VINYLUX in Rouge Red, Cream Puff and Blue Rapture. The last bottle is the CND VINYLUX Weekly Top Coat.

To start, I applied 2 thin coats of Cream Puff. Now, you can see it's a tad streaky, and possibly a 3rd coat would even this all out but I wasn't too concerned - I just wanted a base to marble on.


Then I marbled. I tried a number of variations, including not adding white, alternating white between the red and the blue, and attempting to swirl the colors completely. What transpired was a different design on each nail.


I'm not sure which nail I love the most. They all were so unique in their own way. I was really impressed with the Top Coat, as this was my first trial run with it, and my nails were dry enough to go to bed within 30 minutes. For a long lasting product like this, I expected it to take longer to dry but CND states that the top coat dries in just 8.5 minutes. 

One mistake that I made was that I didn't cap the tips of my nails. I'm at the stage where my length is too long for typing in my day job, leading to tip wear immediately. Because of my tip wear, I had to remove my design but it all works out because I'm getting a manicure before the trip so I can water marble again.  I also got some great tips on my Facebook, including to use a smaller cup and try bottled water. I look forward to marbling again VERY soon.

You can purchase CND VINYLUX for $9.90 per bottle at select salons.

Join CND via their social media channels: Twitter, Facebook, InstagramPinterest and on YouTube.

Disclosure: The product[s] in this post was [were] provided to me by the company for consideration.  For more information, please read this post.

Valentine's Day Nails for Nail It!

Press Sample 

Valentine's Day is coming to a close but in case you're getting ready for a night out, here's a quick DIY for some stylish nails!

Step 1: Start with clean hands and nails painted with your choose of base coat. 


Step 2: Apply two thin coats of Cult Nails Kiss, a primary red cr̬me with a wax finish Рno need for a matte coat!

Cult Nails Kiss ($12 http://www.cultnails.com/kiss/)

Step 3: Using ORLY Instant Artist in black and white, paint the letters “LOVE” on your nails. No worries if you mess up – the ORLY Instant Artist paints are water based so you can rinse your nails and start again! 

ORLY Instant Artist Water Based in Crisp White & Jet Black ($6.50 https://www.orlybeauty.com/nail-color/nail-color-by-collection/instant-artist.html)

Feeling the love? Paint the letters “TRUE” on your left hand for a truly lovely manicure! 

Disclosure: The product[s] in this post was [were] provided to me by the company for consideration.  For more information, please read this post.

PolishGalore is on work/play/polish!

Press Sample

Happy New Year! I'm excited for 2014 - I have some new blogging goals and fun stuff coming up this year starting with my participation in the Blogging for a Cause series over at work/play/polish.

Photo Credit: work/play/polish Instagram
(l to r: PolishGalore, Beauty Judy, Jesse from Jesse's Girl Cosmetics, work/play/polish)

You'll have to visit wpp to see the full manicure and read more about how I found out about Polished Girlz, an organization that I highly encourage you take a second look at. My goal this year is to donate quarterly, mostly monetarily, because polish is something that I love and I want to share the love back.

Nailed Kit - Halloween

Press Sample

While I was at iFabbo's #iFabboSFcon, I had this lovely woman come up to me and ask me about my nails, then show me hers. She had on a skittle of different decorations and colors that made me say "What are you wearing!"  Then she handed me the above envelope with a smile on her face and told me that all the information is inside.

Okay so it wasn't totally as clandestine as that, but it was pretty close to that. She was from Nailed Kit, a company that provides nail art kits that are simple for the beginner (hello, me) but can be used for advanced nail pros too!  The company has 4 different categories of kits - Birthday, Bachelorette, Baby Shower and Girls Night which are based on the decals that in the kit. Pick a category, pick a design and then the rest is auto-generated by the Designer. Each Nailed Kit includes the solid base decals, the design you've selected, rhinestones, a nail file and a shaping stick (orange stick).

Inside my Halloween Kit which HOLY COW, GOES AWAY TOMORROW SO GO NOW IF YOU'RE INTERESTED, was the Spooky Spiders design (USD $12.00) which came with a yellow base decals.

Back to the kit. I love the packaging.

I told you yesterday how much I love branding. Super easy here - it's all written out in steps.

Step 1 - Start It!
Their website says that these are real nail polish strips but they are definitely soft and pliable like nail polish stickers. It reminds me of the NCLA decals vs say the China Glaze nail polish appliques. You do have to be careful during the filing or you will tear the strip (did that one on my pinkie, right off the bat).

Step 2 - Personalize It!

This was my first experience with water decals. I immediately didn't pay attention to instruction 1 and cut my decal too far away from the actual printed image. I used tweezers to drop my decal in the water and remove it, and then when I tried to transfer it to my nail, it was all over my cuticles. I decided to take it off, trim it, put it back in the water for a second and then reapply. It worked but don't do it that way.  I decided to put another water decal over a bare nail and trimmed it properly first. It worked better. I sealed both with essence gel-look top coat.

Step 3 - Bling It Out!
The kit includes a sheet of multicolored rhinestones that are attached in a chain but you can break it apart easily. I added a single rhinestone over the nail polish decal and then a row of rhinestones to my bare nail and sealed both essence gel-look topcoat.


So Nailed Kit - not only can you buy the kits when you wish but they also offer a Monthly Club for $14 a month (currently in a waitlist). They are also available on social media - Facebook, Twitter, Instagram & Pinterest

Overall, great for a look, great for a night out, not something that I would buy on a regular basis but that's mostly because I'm still terrible with the solid base decals. Until I master that, I have very little business trying this out. But I definitely think it's a great stocking stuffer kit for the upcoming holidays and I really hope they have some holiday themed kits coming up soon.

Disclosure: The product[s] in this post was [were] provided to me by the company for consideration.  For more information, please read this post.

NOTD: 24 October 2013

Press Sample 

I finally updated my polish spreadsheet earlier this week when I couldn't sleep and realized I have a LOT of nail polish. Additionally, I have a lot of nail polish that I haven't worn. So a few nights ago I decided to just randomly grab a color and GO.

I had a base coat of Cult Nails Get It On when I decided to grab Morgan Taylor Bronzed & Beautiful, a metallic gold polish. I used two coats and realized metallic gold and I don't go well together. The polish was fantastic - great formula, didn't pool in my cuticles, nice opacity... but my skin tone and gold? Nah.

So I decided to add dots! I can do this. I used Morgan Taylor Lost In Paradise a beautiful Tiffany blue creme. I placed a drop of polish on a plastic nail wheel and dipped my essence dotting tool to add random dots on my ring finger. Okay, not bad - but I just wasn't feeling the dots. The blue didn't pop against the gold as well as I hoped. I topped my manicure with Cult Nails Wicked Fast and decided to sit awhile and think about what I could do when it hit me.

I have a tiny striper brush in my ORLY Instant Artist polish! Now this was apart of the Nail Art Society relaunch kit and it's a funky but awesome concept. The polish (or paint as they call it) is water based so if you mess up, you can just wipe it off with water. Oh yes, you heard me right. Also it's super opaque (which is SO RARE) and then it's a thin brush so you can really draw some lines. So I decided to draw lines around my dots and BAM a leopard mani that Snooki would be proud of.

I attempted to photograph this today but I learned that I've gone WAY too long without taking photos and just about every single one was blurry. Lame.  But I did get this.


Yay! I was actually really proud of this manicure. I was even able to paint my Cinderella hand with the accent too. That's saying something.

PS: Super cool random fact, this is my 1500 post on PolishGalore! Yay milestone!

Disclosure: The product[s] in this post was [were] provided to me by the company for consideration.  For more information, please read this post.

Halloween Nail Art

I'm currently rocking some nubs after snapping not one but three nails last week, so hopefully this posting helps you and I alike find some creative ways to celebrate Halloween with our nails - long or short. All images courtesy of their respective companies.

If nail art isn't your thing, Dermelect Cosmeceuticals has 4 brilliant colors that will help accent your costume or show off your holiday spirit.


Head Turner
A brilliant tangerine creme - perfect for pumpkin related costumes.

Decadence
A metallic espresso - great for a witch or zombie look.

Red-iculous
This classic red creme works great for blood related manicures.

Persuasive
This delicate peach is perfect for princess costumes.

Dermelect ME Anti-Aging Nail Lacquers ($14) at Dermelect.com and high-end apothecaries, beauty boutiques, salons, spas, medi-spas and doctors offices.

Next, Pure Ice has 18 scintillating and stylish shades in their new Perfect Potion Halloween Collection including a Glow in the Dark polish to help you mix and match for the perfect manicure.

Perfect Potion Halloween Shades
-Glow In The Dark
-Cheatin' (glittery purple)
-All Night Long (sparkle blue)
-Hit The Floor (sparkle red)
-I'll Never Tell (glitter brown)
-Superstar (white)
-Blackout (black)
-Can't Stop (coral pink)
-Free Spirit (sea green)
-Silver Star (silver)

At only $1.99, the price is definitely right to collect them all and rock several different looks. Pure Ice is available at Walmart and Walmart.com

CND is constantly being the innovated one that thinks outside the box, and this Halloween they created Hollywood-inspired nail looks to die for. Ask your favorite salon to help recreate these Shellac looks or the last one is done with Vinylux for the at home DIY-er!


 The Redrum - Inspired by the cult classic "The Shining". Created by Heather Reynosa-Davis, CND Education Ambassador.
1. Apply a thin later of CNS Shellac Base Coat and cure for 10 seconds in the CND UV Lamp.
2. Apply two thin layers of CND Shellac in Wildfire. Cure each layer for 2 minutes.
3. Apply a thin layer of CND Shellac in Black Pool - DO NOT CURE.
4. Use a style to etch the letters into the wet Black Pool revealing Wildfire underneath. Cure for 2 minutes.
5. Apply a thin layer of Shellac Top Coat and cure for 2 minutes.
6. Wipe with 99% Isopropyl Alcohol to remove top film.


The Dracula - Inspired by Bram Stoker's 1931 classic horror film. Created by Kris Kiss, CND Education Ambassador
1. Apply CND Shellac Base Coat and cure for 10 seconds in the CND UV Lamp.
2. Apply two coats of CND Shellac in Cream Puff. Cure each layer for 2 minutes.
3. Apply CND Additive in Black Pigment from cuticle towards the center.
4. Apply CND Additive in Red Pigment from the edge towards the center.
5. Apply drops of isopropyl alcohol randomly on black pigment area.
6. Lightly apply CND Shellac in Wildfire over red pigment area and cure for 2 minutes.
7. Lightly dust CND Additive in Steel Dreams over black pigment area.
8. Apply CND Shellac Top Coat and cure for 2 minutes.
9. Wipe with 99% Isopropyl Alcohol to remove top film.


The Alien - Inspired by Steven Spielberg's 1970s Close Encounters of the Third Kind. Created by Torie Bastian, CND Education Ambassador
1. Apply two coats of CND Vinylux in Steal Gaze and wait for it to dry (8.5 minutes).
2. Using a striping brush, draw two large almond shaped eyes using CND Vinylux in Black Pool.
3. With a striping brush, outline the shape of the alien's head and fill in the surrounding area with CND Vinylux in Midnight Swim.
4. For additional effect, use a sponge dipped in CND Vinylux colors of your choice to create a nebulous, space-like look. Let dry for 1 minute.
5. Apply CND Vinylux Weekly Top Coat.

ORLY brings you 4 polishes that are sure to give you just the right of glitz and glam for any Halloween Look.
Black Pixel, Right Amount of Evil, R.I.O. and Monster Mash; $10 each at OrlyBeauty.com. Additionally, ORLY is offering free shipping on all orders over $16 with the code FALLFREESHIP from now until November 15th. Any guest who makes a purchase using FALLFREESHIP is additionally eligible to receive a coupon code for 20% off their next order. All 20% off coupon codes are eligible for savings through December 15th.

Finally, Gelish brings you a great Spooky Eyes nail art from head manicurist Danielle Candido. This is great for those who may not be able to dress up at the office but can rock a look on their nails! (And it's also for someone like me who may be a little nail art challenged!)

Prep the nails first: Apply Gelish MINI Nail Surface Cleanse on to a lint-free wipe to clean the nails. Push back the cuticle and clean the surrounding nail. Apply an adhesive tab to the plastic pusher and lightly buff the nail to remove the shine. Apply Gelish MINI Nail Surface Cleanse to a lint-free wipe to remove the dust and clean the nails. Dehydrate the nail plate with Gelish MINI pH Bond. 


1. Apply a thin coat of Gelish MINI Foundation Gel to the nail, making sure to cap the free edge. Use a clean orangewood stick to clean up any excess Gelish MINI Foundation Gel from around the cuticle or under the nail. Cure in the Gelish MINI Pro: 45 LED Light for 45 seconds. After curing Gelish MINI Foundation Gel, a tacky surface will remain. 


2. Apply a thin coat of Gelish MINI Black Shadow to the entire nail bed from the cuticle to the free edge.  Cure in the Gelish MINI Pro: 45 LED Light for 45 seconds. Apply a second coat of Gelish MINI Black Shadow for full coverage. Cure in the Gelish MINI Pro: 45 LED Light for 45 seconds. Darker colors, such as Gelish MINI Black Shadow may need to be cured longer. 


3. Using the larger end of a double-ended dotting tool, place two dots of Gelish MINI Sheek White on the nail bed next to each other. Cure in the Gelish MINI Pro: 45 LED light for 45 seconds. Using the smaller end of the double-ended dotting tool, place two smaller dots of Gelish MINI Black Shadow inside the dots of Gelish MINI Sheek White. Cure in the Gelish MINI Pro: 45 LED light for 45 seconds. 


4. Seal with a thin coat of Gelish MINI Top It Off Sealer and cure in the Gelish MINI Pro: 45 LED Light for 45 seconds. Your nails will remain tacky until they are cleansed. 


5. Apply Gelish MINI Nail Surface Cleanse to a lint-free nail wipe to remove the tacky surface. To finish, apply Gelish MINI Nourish Cuticle Oil to the skin surrounding the nail plate and massage into the cuticles.  


There you have it! No matter what your skill level or what products you have, there are many options to rock a great manicure next week for Halloween. Stay tuned to PolishGalore to see what I ended up wearing next Thursday!

#31DC2013 Day 7: B&W Nails


It's been really awesome to see people participating in the #31DC2013 on Instagram - people are just so creative! For today's challenge - B&W - I didn't know what I wanted but I knew I wanted to break out my Konad... which has literally been collecting dust since I bought them back in 2010. Shame, I know.

I started with a base of Cult Nails Get It On, one coat of Cult Nails Fetish (a wax finish black) and then for my stamping polish, I used Cult Nails Temptest. For stamping plate, I used the full designs on Konad plate m65. I didn't stamp my pinkie finger and used the ORLY Instant Artist in Crisp White to make my little triangle.


I stamped my ring finger first and it went okay but I didn't let it dry enough and so it smudged when I added Cult Nails Wicked Fast top coat.  Next I stamped my middle finger but didn't line my stamper up right so only 3/4ths of the nail was stamped. On my pointer I pretty much got it down!

Either way, I'm happy with my attempts and look forward to the rest of the challenges as they come!

Disclosure: The product[s] in this post was [were] provided to me by the company for consideration.  For more information, please read this post.

#31DC2013 Day 6: Violet Nails


I was probably most happy to get to Day 6 - Violet Nails. I absolutely love wearing purple polish.  I had a base coat of Cult Nails Get It On before decided to wear the new Zoya PixieDust in Carter and then decided to take some striping tape to my ring finger and add a coat of Zoya PixieDust in Stevie. I was really happy with the results. I didn't use top coat for this manicure except on my accent nail but it was a thin layer to keep the PixieDust effect.


I'm in love.

I'm also in love with my CND Special Edition SolarOil. It was released last year and it has hints of vanilla and golden amber. I found out that they are releasing it this year as well and have already purchased a bottle.

Disclosure: The product[s] in this post was [were] provided to me by the company for consideration.  For more information, please read this post.

#31DC2013 Day 5: Blue Nails


I told you I'd catch up! Challenge #5 is Blue Nails - and I was worried about staining so I decided to go with a lighter blue.

I used a base coat of Seche Natural for a matte finish, 2 coats of China Glaze Sci-Fly By which is from the Hologlam collection and then attempted The Nailasaurus waterfall manicure using ORLY Instant Artist in Crisp White, Jet Black and True Blue.


I don't think I totally nailed it, but I'm excited about how simple this was! The stripers on the ORLY Instant Artist are the perfect size for small lines like this - although I think I need to make my lines closer in size and maybe just make more lines in general.  I had tried a few weeks ago and it wasn't really a win.

But hey, it's a learning experience and I'm learning!

Disclosure: The product[s] in this post was [were] provided to me by the company for consideration.  For more information, please read this post.

#31DC2013 Day 4: Green Nails


Day 4 means green nails - one of my least favorite of the polish colors. I started with a base of Cult Nails Get It On followed by 2 coats of Zoya Meg, a shimmery apple green polish. Next I added dots using Ruby Wing Birdie and outlined them with ORLY Instant Artist striper in Jet Black. I did not add a top coat but voila - we have instant cheetah print... in wild colors.


Simple - not overly complicated! The toughest part was outlining the dots as my hand isn't as steady as I'd like but I think it went over okay!


Disclosure: The product[s] in this post was [were] provided to me by the company for consideration.  For more information, please read this post.